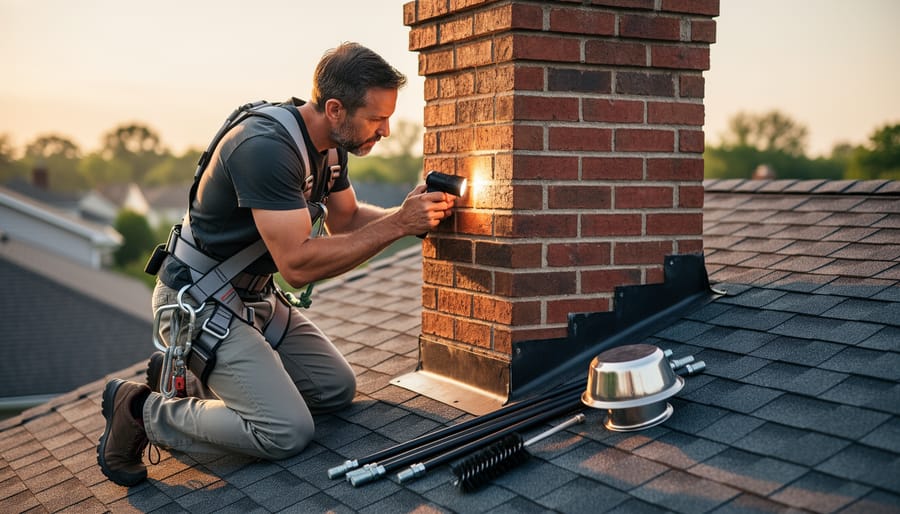
Inspect your chimney annually before the heating season by checking for cracked mortar, loose bricks, and deteriorating flue liners from inside your home using a flashlight. Look for white staining (efflorescence), which signals water penetration and requires immediate attention—if you’re unsure about structural issues, consulting professionals like St Petersburg chimney repair experts can prevent dangerous situations. Clean creosote buildup yourself using specialized chimney brushes and rods when deposits measure less than 1/8 inch thick, but call professionals for heavier accumulations that pose fire risks.
Your chimney works harder than almost any other part of your home, enduring extreme temperature changes, moisture, and combustion byproducts every time you light a fire. While professional inspections remain essential for safety, many routine maintenance tasks and minor repairs fall well within DIY capabilities—saving you hundreds of dollars annually while keeping your family safe.
This guide empowers you to tackle preventive maintenance confidently while recognizing when professional help becomes necessary. You’ll learn to seal minor cracks, repair mortar joints, install rain caps, and establish a maintenance schedule that prevents small issues from becoming expensive emergencies. These home improvement projects require basic tools, patience, and respect for safety boundaries.
Understanding your chimney’s anatomy helps you spot problems early. The flue carries smoke and gases out, the crown seals the top, the flashing prevents roof leaks, and the firebox contains the fire. Each component requires specific attention, and knowing what you’re looking at makes maintenance straightforward rather than intimidating.
Whether you’re addressing visible damage or establishing preventive care routines, taking ownership of chimney maintenance protects your investment and ensures cozy, worry-free fires for years ahead.
When Your Chimney is Telling You Something’s Wrong
Your chimney might be trying to get your attention, and recognizing these signs early can save you from bigger headaches down the road. Think of it like your house giving you gentle nudges before things get serious.
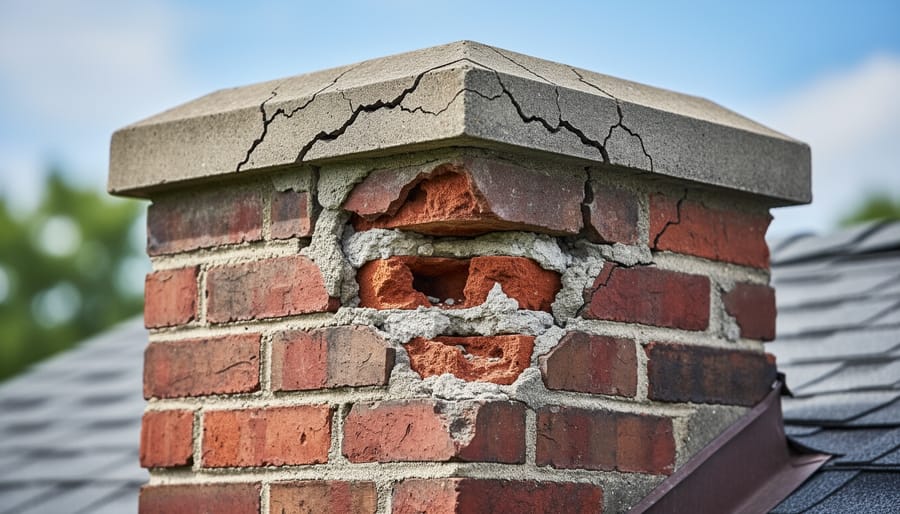
Let’s start with what you can see from the ground. Grab a pair of binoculars and take a look at your chimney’s exterior. Are there bricks that look crumbly or pieces of mortar missing between them? Maybe you’ve noticed white staining that looks almost chalky on the bricks. That’s called efflorescence, and it means moisture is working its way through your masonry. While you’re looking up there, check if your chimney cap is damaged or missing entirely. A damaged cap is like leaving your front door open during a rainstorm.
Now, let’s talk about smells. If you’re getting whiffs of something musty or damp when you’re near your fireplace, even when it’s not in use, that’s moisture sneaking in where it shouldn’t be. During the warmer months, you might notice odors that smell a bit like a campfire gone wrong. These aren’t just unpleasant – they’re messages that something needs your attention.
Pay attention to how your fireplace performs too. Does smoke seem reluctant to go up the chimney, drifting back into your room instead? That’s a draft problem, and it could mean blockages or structural issues that need addressing.
Finally, take a walk around inside your home. Water stains on the ceiling near your chimney or dampness on the walls around your fireplace are red flags. Water is chimney enemy number one, and these stains are evidence it’s already gotten inside.
The good news? Catching these signs early means you can tackle many issues yourself before they become expensive professional jobs. Trust your observations – if something seems off, it probably is.
Safety First: What You Can (and Can’t) DIY
DIY-Friendly Chimney Projects
Ready to roll up your sleeves? There are several chimney maintenance tasks perfect for weekend warriors like yourself. Let’s explore what you can confidently tackle without calling in the pros.
Basic chimney cleaning is surprisingly manageable once you have the right tools. If you burn less than a cord of wood annually, you can likely handle routine sweeping yourself using a chimney brush kit matched to your flue size. Just remember to seal off your fireplace opening with plastic sheeting and work from the rooftop down for best results.
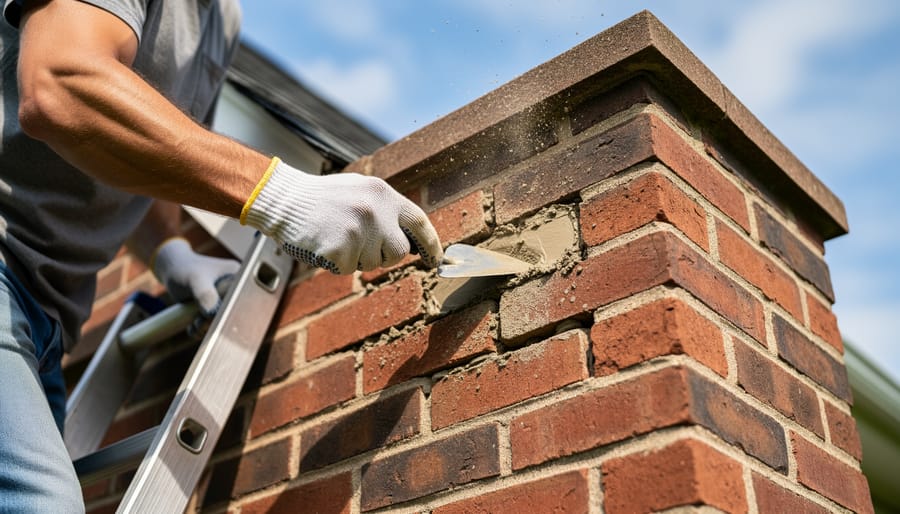
Minor mortar repairs are another great DIY project. When you spot small cracks or missing mortar between bricks, you can easily repoint them using premixed mortar and a trowel. This prevents water infiltration that could lead to major structural issues down the road.
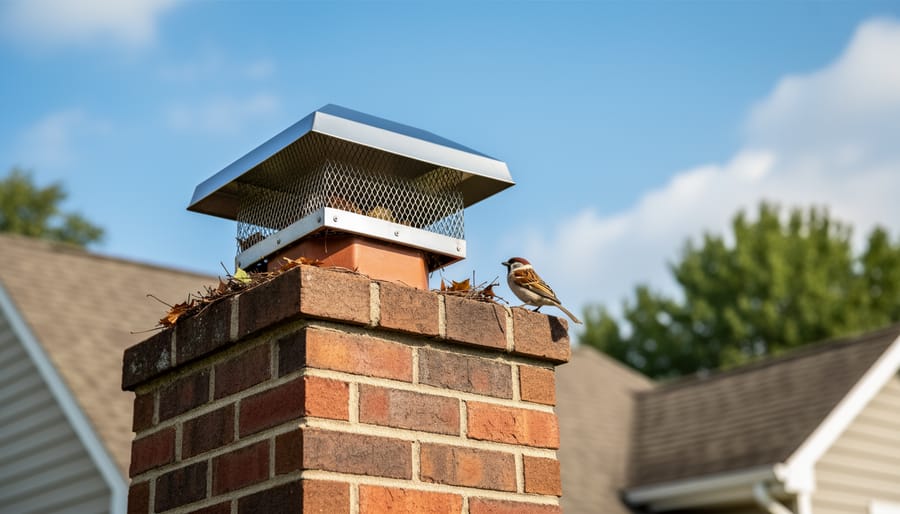
Installing or replacing a chimney cap ranks among the most rewarding projects you’ll complete. These protective covers prevent rain, animals, and debris from entering your flue while requiring only basic tools and an afternoon of your time. Most caps simply attach with screws or clamps around the flue opening.
Don’t forget about weatherproofing your chimney crown with elastomeric sealant. This simple step prevents water damage and extends your chimney’s lifespan significantly. Apply it on a dry day, and you’re protecting your investment for years to come.
When to Call in the Experts
While many chimney tasks are totally within your DIY skillset, some situations call for bringing in a certified chimney professional. This isn’t about doubting your abilities—it’s about working smart and keeping your home safe.
Definitely reach out to a pro if you notice structural cracks in the masonry that extend beyond surface-level wear. These can indicate serious settling or water damage that needs expert assessment. Similarly, if your chimney liner is damaged or missing, this isn’t a weekend project. Liners protect your home from dangerous heat and gases, and proper installation requires specialized tools and training.
Issues at the roofline, where your chimney meets the roof, also warrant professional attention. The flashing here prevents water infiltration, and getting it wrong can lead to expensive interior damage. A chimney sweep should handle this delicate work.
If your chimney leans noticeably or you see chunks of masonry falling away, stop using your fireplace immediately and call someone. These are red flags for potential collapse.
Finally, when you’re simply unsure about what you’re seeing during an inspection, trust your instincts. A professional chimney sweep can provide peace of mind and catch problems early. Think of it as a partnership—you handle the regular upkeep, and they tackle the technical challenges. That’s a win-win approach to chimney care.
Your Essential Chimney Maintenance Toolkit
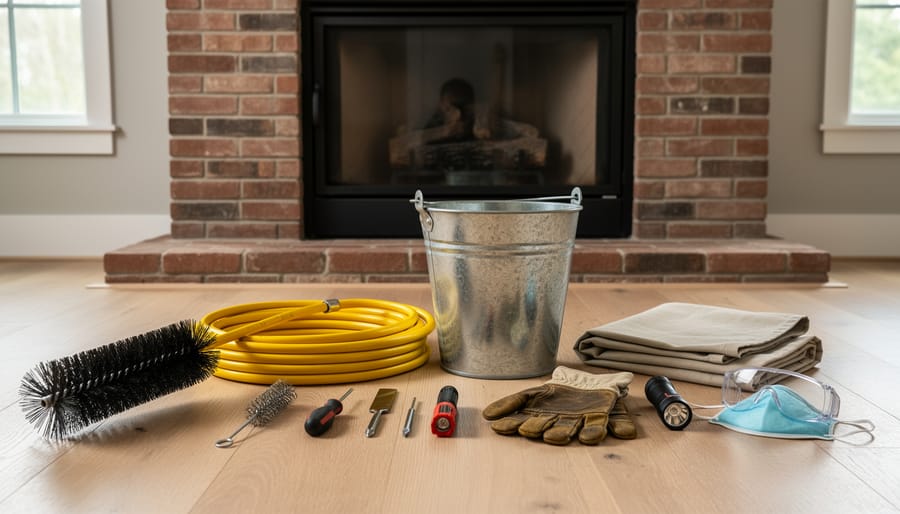
Getting started with chimney maintenance doesn’t require breaking the bank or owning a professional workshop. With a modest investment and choosing the right tools, you’ll be ready to tackle basic upkeep and catch potential problems before they become expensive repairs.
Your foundation toolkit should include a quality chimney brush sized to match your flue dimensions. These typically run between $25-$50 at home improvement stores or online retailers. Don’t forget extension rods to help you reach the entire chimney length. A sturdy wire brush and putty knife, usually under $15 combined, are perfect for removing creosote buildup and preparing surfaces for repairs.
For inspection work, invest in a bright LED flashlight or headlamp (around $20-$40) and a small inspection mirror, which costs just a few dollars. These simple tools help you spot cracks, loose mortar, or debris that might otherwise go unnoticed. A basic digital camera or your smartphone works wonderfully for documenting conditions and tracking changes over time.
Safety equipment is non-negotiable. A comfortable dust mask or respirator protects your lungs from soot and debris, while work gloves shield your hands from rough surfaces and sharp edges. Safety glasses prevent falling debris from causing eye injuries. This protective gear costs roughly $30-$50 total and lasts for years.
For minor repairs, keep premixed mortar or refractory cement on hand, available at hardware stores for about $15-$25 per container. A small trowel and pointing tool complete your repair arsenal for another $20 or so.
You’ll find everything at local hardware stores, home improvement centers like Home Depot or Lowe’s, or through online retailers. Many stores offer beginner-friendly advice if you’re unsure which products suit your specific chimney type. Starting with this basic toolkit keeps your initial investment under $200 while giving you everything needed for routine maintenance and small repairs.
The Annual Chimney Checkup You Can Do in an Afternoon
Think of your annual chimney checkup like a friendly conversation with your home. You’re not just looking for problems—you’re getting to know what normal looks like so you can spot when something’s off. Grab a flashlight, a notepad, and a couple of hours on a nice afternoon, and let’s walk through this together.
Start from the outside and work your way in. Head up to your roof (only if you’re comfortable doing so—there’s no shame in using binoculars from the ground). Look at your chimney crown, that concrete cap at the very top. You’re checking for cracks or chunks that might have broken off. Even hairline cracks matter because water sneaks in and freezes, making them bigger every winter.
Next, examine the chimney cap and screen. This metal covering keeps rain, animals, and debris out of your flue. Give it a gentle wiggle to make sure it’s secure. Look for rust, dents, or any gaps where a determined squirrel might squeeze through. If you spot a bird’s nest, that’s your sign to schedule a cleaning before your next fire.
Now check out the mortar between the bricks. Run your hand along the joints if you can reach them safely. Does the mortar crumble when you touch it? Can you scrape it out easily with a key? These are signs of deterioration that need attention sooner rather than later.
Head inside and open your damper. Shine that flashlight straight up the flue. You’re looking for daylight at the top, which means the passage is clear. While you’re looking up, check for any visible creosote buildup—it looks like black or brown crusty coating on the chimney walls. If it’s thicker than an eighth of an inch, you’ll need a cleaning before using your fireplace again.
Check around the base of your chimney inside your home. Run your hand along the walls near the fireplace. Do they feel damp? Any water stains on the ceiling nearby? Moisture is your chimney’s worst enemy and often the first sign of a leak.
Finally, test your damper by opening and closing it a few times. It should move smoothly and seal completely when closed. A stuck or loose damper wastes energy and lets weather in.
Jot down everything you found during your inspection. Even small issues are worth noting so you can track whether they’re getting worse over time. This simple afternoon ritual helps you catch the little things before they become big, expensive headaches.
Fixing Common Chimney Problems Yourself
Patching Crumbling Mortar Between Bricks
Repointing your chimney’s mortar joints might sound intimidating, but it’s actually one of those satisfying projects where you can see immediate results. Think of it as giving your chimney a fresh lease on life!
Start by inspecting the mortar between your bricks. If you can easily scrape it out with a screwdriver or notice it’s crumbling away, it’s time to repoint. Use a cold chisel and hammer to carefully remove the damaged mortar to a depth of about three-quarters of an inch. Work gently to avoid damaging the bricks themselves, and always wear safety glasses during this step.
Once you’ve cleaned out the old material, brush away all dust and debris with a stiff-bristled brush, then lightly mist the joints with water. This prevents the dry bricks from sucking moisture out of your fresh mortar too quickly.
For mixing mortar, premixed bags specifically labeled for repointing are your best friend. Follow the package directions carefully, aiming for a consistency similar to peanut butter. Too wet, and it’ll slump out; too dry, and it won’t bond properly.
Load your pointing trowel with mortar and press it firmly into the joints, working from bottom to top. Pack it tightly to eliminate air pockets. After about thirty minutes, when the mortar is firm but not hard, use a jointing tool to smooth and shape the joints to match your existing pattern.
Let everything cure slowly over several days, keeping the area slightly damp if weather is hot and dry.
Sealing Cracks in Your Chimney Crown
Your chimney crown is the concrete top that seals the gap between your chimney liner and the outer structure, and it’s your first line of defense against water damage. Start by inspecting it on a clear day using binoculars from the ground or safely from a ladder if you’re comfortable with heights. Look for hairline cracks, gaps, or crumbling areas where water could sneak in.
If you spot minor cracks (less than a quarter-inch wide), you’re in luck because this is totally fixable! Clean the area thoroughly with a wire brush, removing any loose debris or vegetation. A crown sealant specifically designed for chimneys works best here. These elastomeric sealants flex with temperature changes, which is exactly what you need.
Apply the sealant according to the manufacturer’s instructions, typically using a brush or trowel to work it into the cracks. Don’t skimp on coverage; a good coating extends slightly beyond the damaged area. For best results, tackle this project during mild, dry weather and allow proper curing time.
Remember, larger cracks or chunks of missing concrete mean it’s time to call a professional. There’s no shame in recognizing when a project needs expert hands. You’re protecting your home and your safety.
Installing or Replacing a Chimney Cap
A chimney cap is your chimney’s first line of defense against rain, snow, animals, and debris. Installing one is among the most rewarding DIY installation projects you can tackle, and it can prevent expensive water damage down the road.
Start by measuring the outside dimensions of your chimney flue. Caps come in various sizes and materials, with stainless steel being the most durable option. Look for models with mesh screening that keeps out birds and squirrels while allowing smoke to escape freely.
Before heading to the roof, gather your supplies: the chimney cap, drill with masonry bits, stainless steel screws, and safety equipment including a sturdy ladder and non-slip shoes. Never work on your roof alone or in wet, windy conditions.
Once safely positioned, clean the chimney crown surface where the cap will sit. Most caps attach directly to the flue using adjustable clamps or mounting brackets. Tighten screws evenly to ensure a snug, weatherproof fit. Some models require drilling into the crown, so follow the manufacturer’s instructions carefully.
Test the installation by gently tugging the cap to confirm it’s secure. With proper installation, your new chimney cap should last fifteen years or more.
Cleaning Light Creosote Buildup
Light creosote appears as a flaky, soot-like coating that’s relatively easy to tackle yourself. Start by ensuring your fireplace is completely cool and hasn’t been used for at least 24 hours. Spread drop cloths to protect your floor and wear safety goggles, gloves, and a dust mask.
For light buildup, use a chimney brush designed for your flue type—wire for metal liners, poly for clay tiles. Working from the bottom up, gently scrub in circular motions to loosen the deposits. You can also try natural cleaning solutions for minor soot stains around the firebox.
Here’s the critical part: if the creosote looks shiny, tar-like, or measures more than one-eighth inch thick, stop immediately and call a professional. These advanced stages are highly flammable and require specialized equipment. Also seek professional help if you notice a strong odor or can’t reach certain areas safely. Regular inspection every few months helps you catch buildup early when it’s still manageable.
Weatherproofing Your Chimney Against the Elements
Water is your chimney’s greatest enemy, and protecting it from the elements doesn’t require advanced skills or expensive materials. Think of weatherproofing as giving your chimney a raincoat – it’s all about keeping moisture out before it causes real damage.
Start at the top with your chimney cap. If you don’t already have one, installing a cap is your single best defense against water, animals, and debris. These metal covers come in various sizes and simply attach to your chimney crown or flue. Choose one with mesh sides to prevent rain from driving straight down your flue while allowing smoke to escape freely.
Next, examine your chimney crown – that concrete slab at the very top. Look for cracks or chips, which turn into major problems during freeze-thaw cycles when water seeps in, freezes, expands, and breaks apart the structure. You can repair minor crown damage yourself using elastomeric crown coating or sealant, which you’ll find at most home improvement stores. Apply it on a dry day and let it cure completely.
Your flashing deserves special attention too. This metal barrier where your chimney meets the roof should form a watertight seal. Run your hand along it feeling for gaps or loose sections. Small openings can be sealed with roofing cement or high-quality caulk designed for outdoor use. If you notice extensive rust or large gaps, this might be time to call in professional help.
Consider applying a breathable waterproofing sealer to your chimney’s exterior bricks. Unlike regular paint, these sealers let moisture escape from inside while blocking water from entering. Apply with a garden sprayer on a clear day, following the manufacturer’s directions carefully.
Remember to check these weatherproofing elements twice yearly – once before winter and again after spring storms. Catching small issues early saves you from major headaches and expensive repairs down the road. You’ve got this!
Creating Your Seasonal Chimney Care Schedule
Taking care of your chimney doesn’t have to feel like a never-ending to-do list. Breaking it down by season makes it much more manageable, and you’ll actually enjoy seeing how these small efforts protect your home year-round.
Spring is your inspection season. Once the cold weather passes and you’re done using your fireplace regularly, schedule a thorough cleaning. This is the perfect time to remove all that winter soot and creosote buildup while checking for any damage that occurred during heavy use. Look for cracks, loose bricks, or damaged mortar joints while everything is fresh in your mind.
Summer gives you ideal weather for bigger projects. The warm, dry conditions are perfect for any masonry repairs you discovered in spring. Tackle that repointing work, seal any cracks, and apply waterproofing treatments. Your mortar will cure properly, and you won’t be racing against dropping temperatures.
Fall is all about preparation. Before you light that first cozy fire, do a quick visual inspection from top to bottom. Check your chimney cap and make sure it’s secure. Clear any debris that accumulated over summer, like leaves or bird nests. Test your damper to ensure it opens and closes smoothly. This is also a great time to stock up on supplies you’ll need for winter maintenance.
Winter requires the lightest touch but regular attention. Between uses, check for excessive creosote buildup and monitor for any unusual odors or smoking issues. Keep the area around your fireplace clear and watch for warning signs that something needs immediate attention.
This seasonal rhythm becomes second nature quickly, and you’ll feel confident knowing your chimney is always in great shape.
Money-Saving Tips That Actually Work
Let’s talk real numbers, because that’s what matters most when you’re deciding whether to tackle chimney maintenance yourself. A professional chimney inspection typically costs between $150-$450, while doing your own visual inspection costs you nothing but 30 minutes of your time. Annual cleaning services run $200-$500, but if you invest in a basic chimney brush set for around $40-$80, you can handle routine cleaning yourself for years to come.
The biggest money-saver? Catching small problems early through regular DIY inspections. A minor mortar repair that you can fix yourself for $20-$50 in materials becomes a $500-$1,500 professional job if you let it deteriorate. Similarly, replacing a chimney cap yourself costs about $50-$200 for materials versus $300-$600 when hiring someone. Just like other DIY home projects, the labor savings add up quickly.
For affordable materials, check your local masonry supply stores rather than big-box retailers. They often have better quality products at lower prices. Online marketplaces can offer deals on chimney brushes and safety equipment, but always verify proper sizing before purchasing.
Now, here’s where not to cut corners: never skip buying proper safety gear, and don’t substitute household cleaners for actual creosote removers. That $15 savings isn’t worth the fire risk. Also avoid buying the cheapest mortar mix available. Mid-grade materials last significantly longer and prevent recurring repairs.
The bottom line? Homeowners who commit to annual DIY inspections and basic maintenance typically save $300-$800 annually compared to those who only call professionals when problems arise. Prevention truly pays off here.
You’ve taken an important step in becoming a confident homeowner by learning about chimney care. Remember, maintaining a safe and efficient chimney doesn’t require you to become an expert overnight. Small, consistent efforts make all the difference between a well-functioning chimney and a major headache down the road.
The key takeaways are simple: inspect your chimney regularly, tackle minor cleaning tasks yourself, stay on top of seasonal maintenance, and recognize when a situation calls for professional help. There’s absolutely no shame in calling an expert for complex repairs or annual inspections. In fact, knowing your limits is part of being a responsible DIY enthusiast.
By dedicating just a few hours each season to basic chimney maintenance, you’ll prevent issues like water damage, creosote buildup, and structural deterioration that could cost thousands to repair. Think of it as an investment in your home’s safety and your family’s comfort.
We’d love to hear about your chimney maintenance experiences! Head over to our community forum to share your success stories, ask questions, or learn from fellow homeowners who’ve tackled similar projects. Whether you’ve just completed your first chimney inspection or you’ve discovered a clever maintenance trick, your insights help others on their home improvement journey. Together, we’re building a community where everyone feels empowered to take care of their homes, one project at a time.